How to Create Your Own Levels in Geometry Dash: A Comprehensive Guide
Learn How to Utilize Geometry Dash's Level Editor to Design and Compete with Customized Levels Against Other Players
Geometry Dash Level Editor Demystified
As you dive into the rhythmic world of Geometry Dash, you’ll find yourself immersed in a captivating experience crafted by other players. After spending some time playing, you may develop a curiosity to become a part of it by creating your own levels or experimenting with the level editor process to understand how it works.
But here’s the catch: when you first enter the level editor, you’ll come across a myriad of buttons and options that might make your head spin. Don’t fret! This guide is here to assist you in getting started with the level editor and becoming familiar with its functions.
Quick Links
🎮 How To Start A New Level
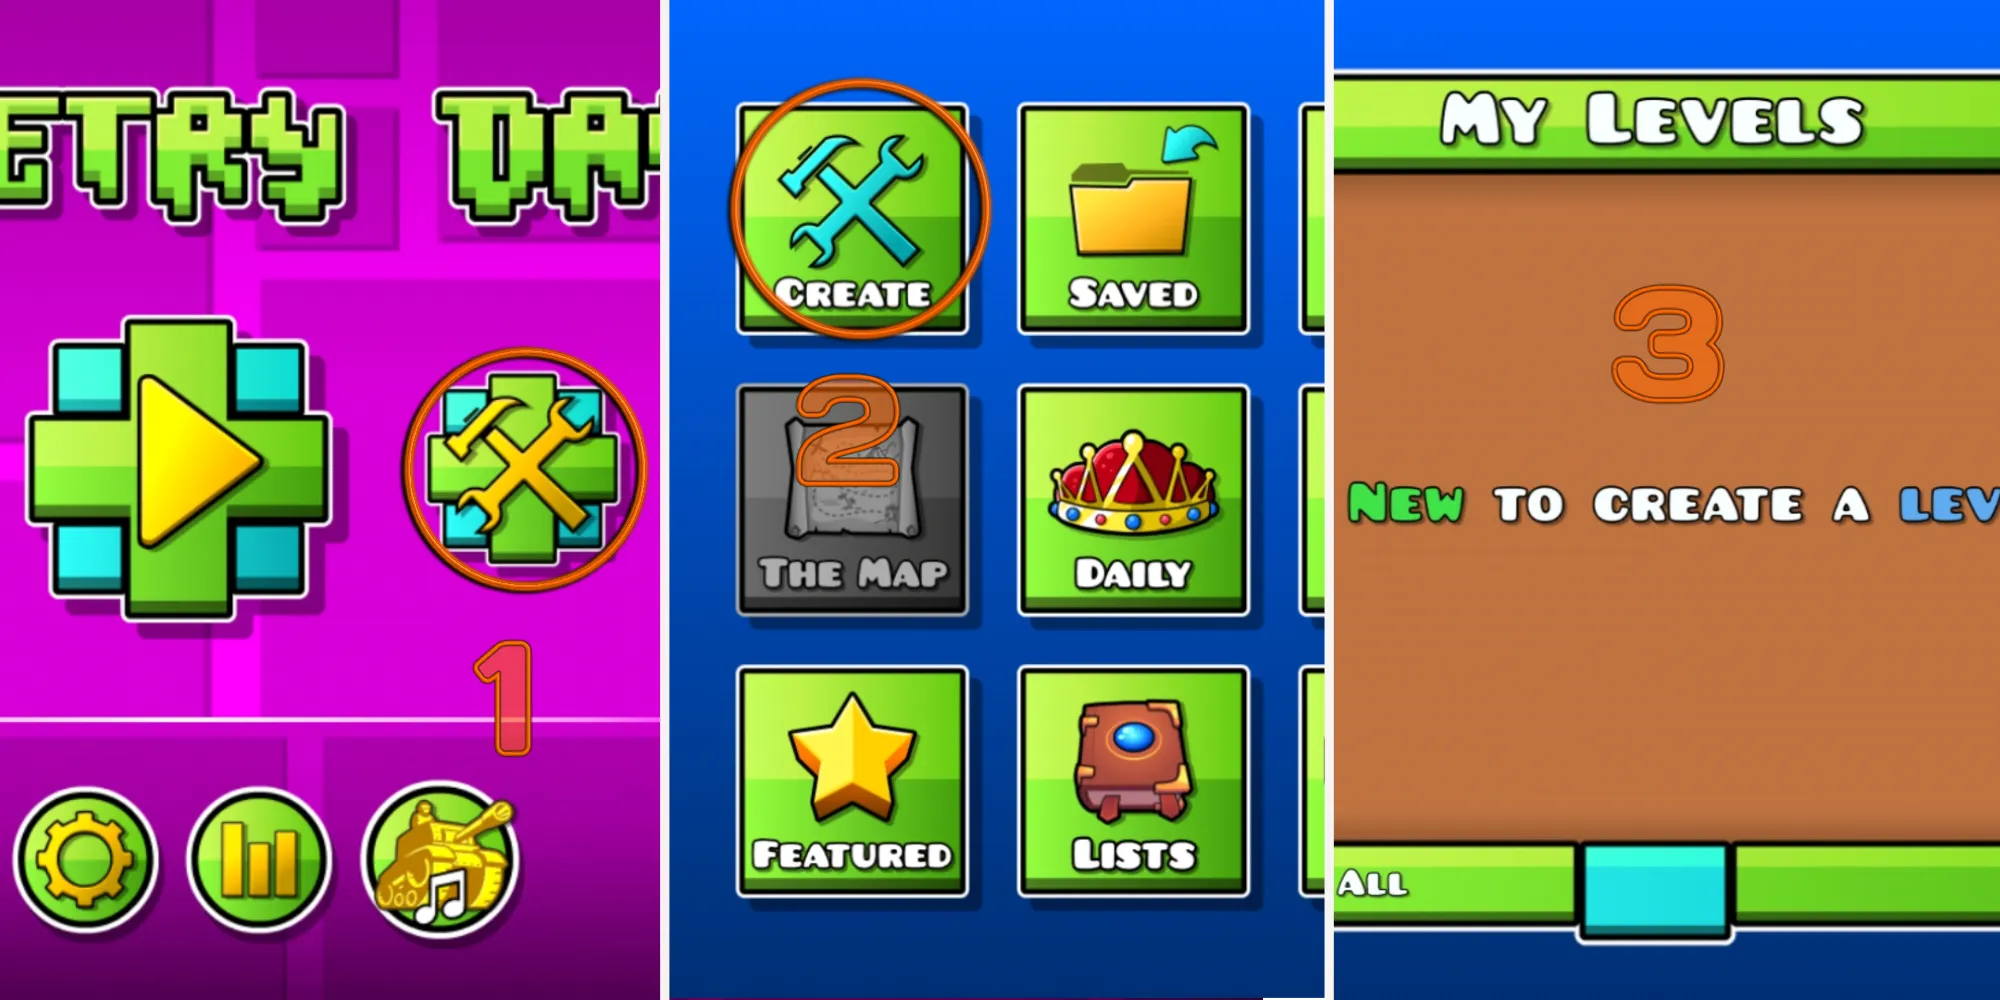
When you’re ready to embark on your level creation journey, follow these steps:
- Go to the main screen and click on the hammer and wrench icon on the right.
- Then, select “Create” to access the level editor.
- Now, you’ll find yourself in the “My Levels” menu, where you can create a new level, edit existing ones, or view the levels you’ve copied before.
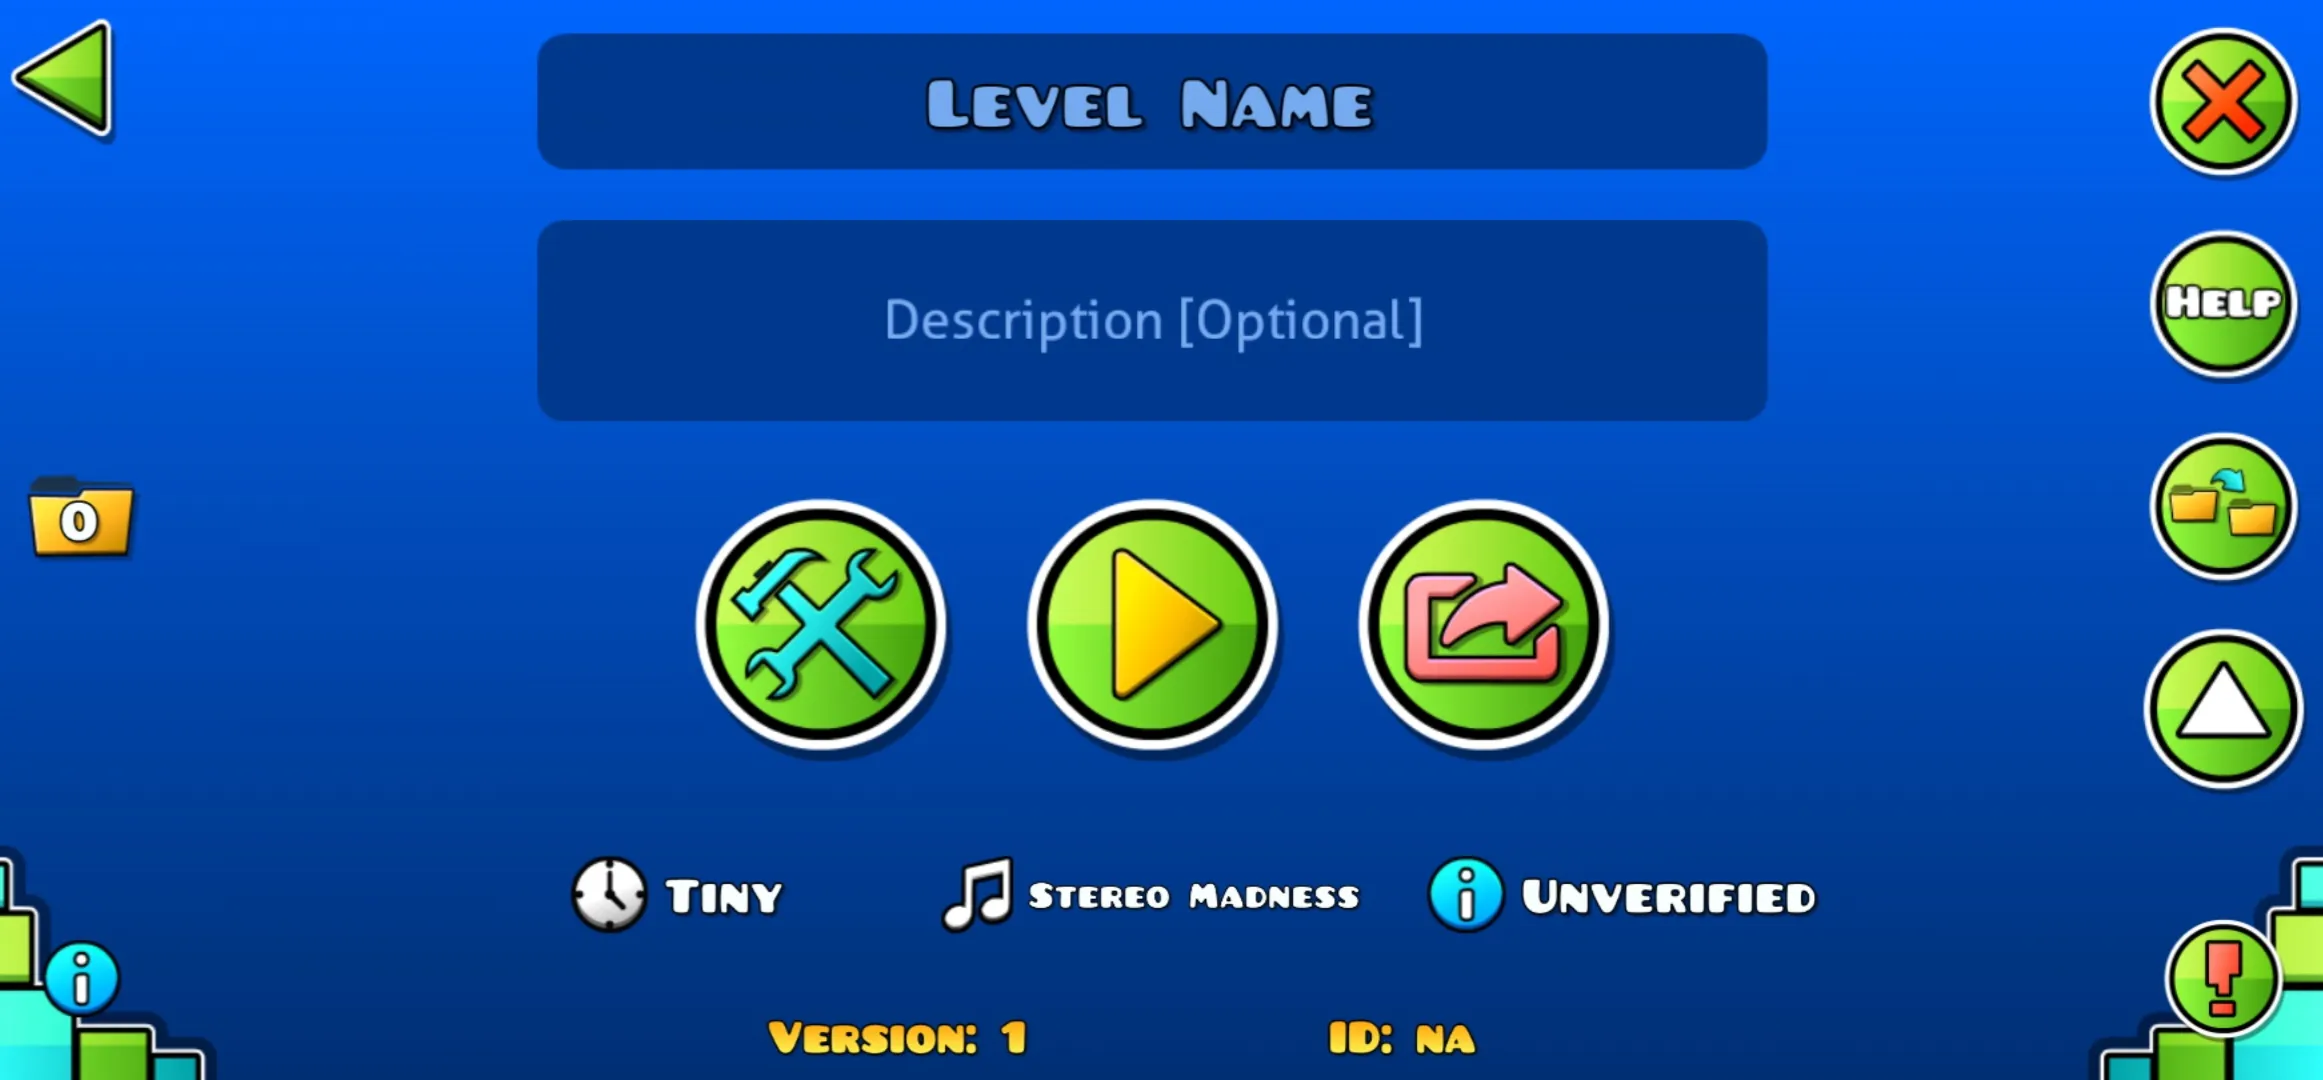
In the level menu, you can input a name and description for your level (optional). The three main buttons in the middle of the menu allow you to play, upload, and edit the level. Remember, you need to complete the level yourself and turn it into a verified level before you can upload it. So, strap on those gaming gloves!
Before you start creating a challenging level, make sure you’re the first to complete it. It’s a crucial step for uploading it. If your level includes user coins, be sure to collect them all. Each attempt to collect a coin will update the requirement tag to indicate the coins you’re yet to obtain.
- The Epic Battle for Vegapunk’s Survival: Will He Escape the Egghead...
- The Wonderful World of Harem Games: More Than Just Love Interests
- Cast a Deadly Spell: A Fun and Campy Take on Lovecraftian Horror
⚙️ Level Settings
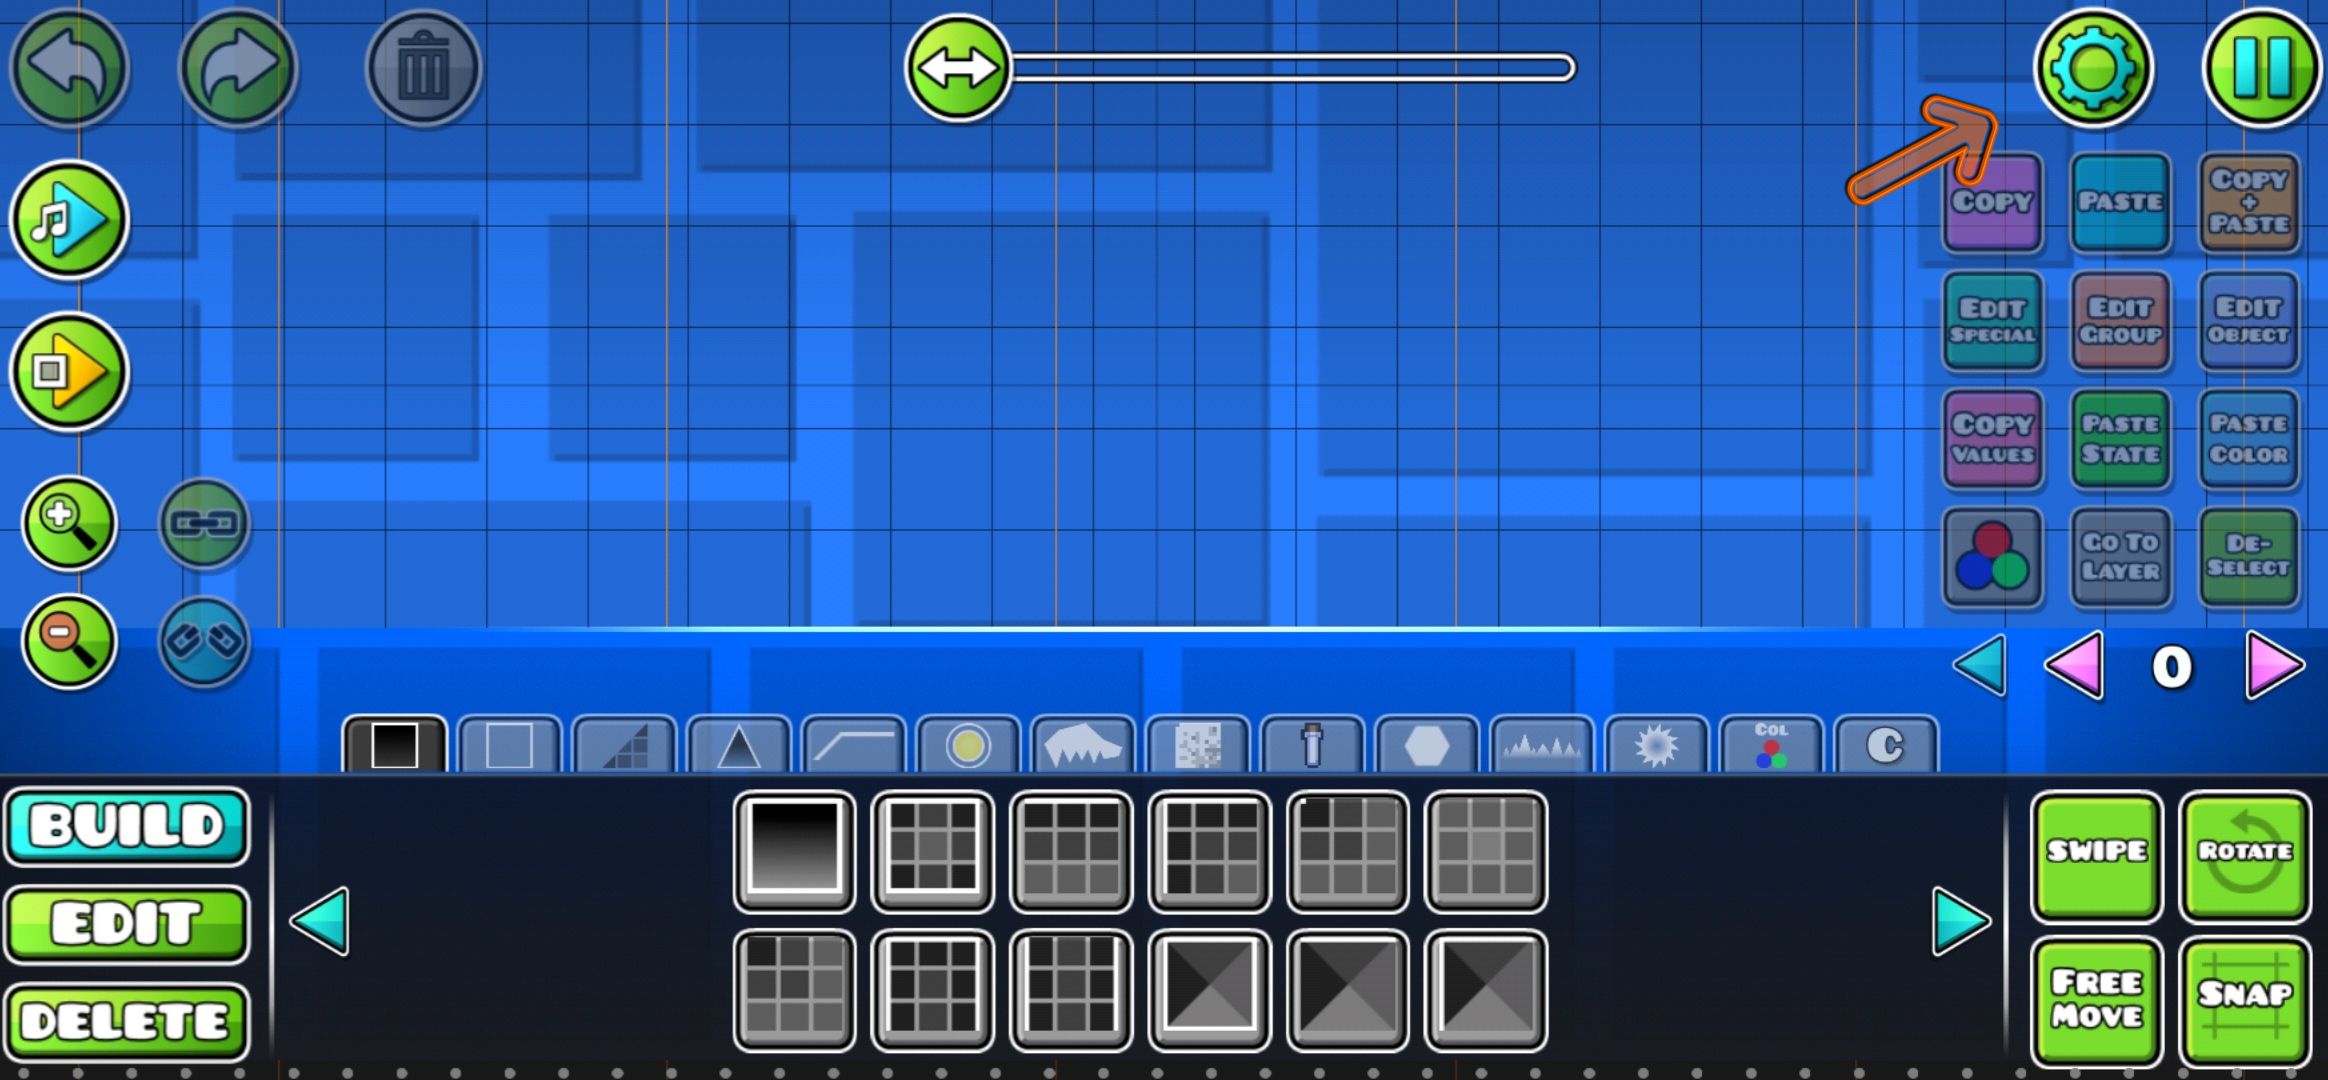
Once you’re in the level editor, setting up the level settings is the first step. Click on the gear icon at the top right to access the level settings.
In the level settings, you’ll find several options for configuring your level:
Level Type
- Decide whether you want a classic level with an auto-scrolling screen or a platformer that allows free movement.
Speed
- Choose the speed of your level. There are five types of speed available, starting with the normal speed indicated by the color blue. Consider the overall design and difficulty of your level when selecting the speed.
Mode
- Select the mode in which your level will start. This determines the player’s movement when clicking. Keep in mind that you can add mode-changing portals during gameplay.
Options
- Under the “Option” label, you’ll find various features like Mini Mode, Dual Mode, Rotate Gameplay, Flip Gravity, and Reverse Gameplay that allow you to customize your level and add special effects.
Background and Color
- Customize the appearance of your level’s background, ground, and middle ground layers. You can choose colors, change the font, and create a unique visual experience for your players.
Music
- Select a soundtrack for your level. Choose from the game’s default songs or explore the vast music library available through Newgrounds for more options.
Remember, the choices you make in level settings will greatly impact your level’s overall experience, so choose wisely!
🎨 Level Editor UI
Now that you’ve set up the level settings, it’s time to unleash your creativity by placing objects and building your level. But before you do that, let’s understand the different components of the level editor UI:
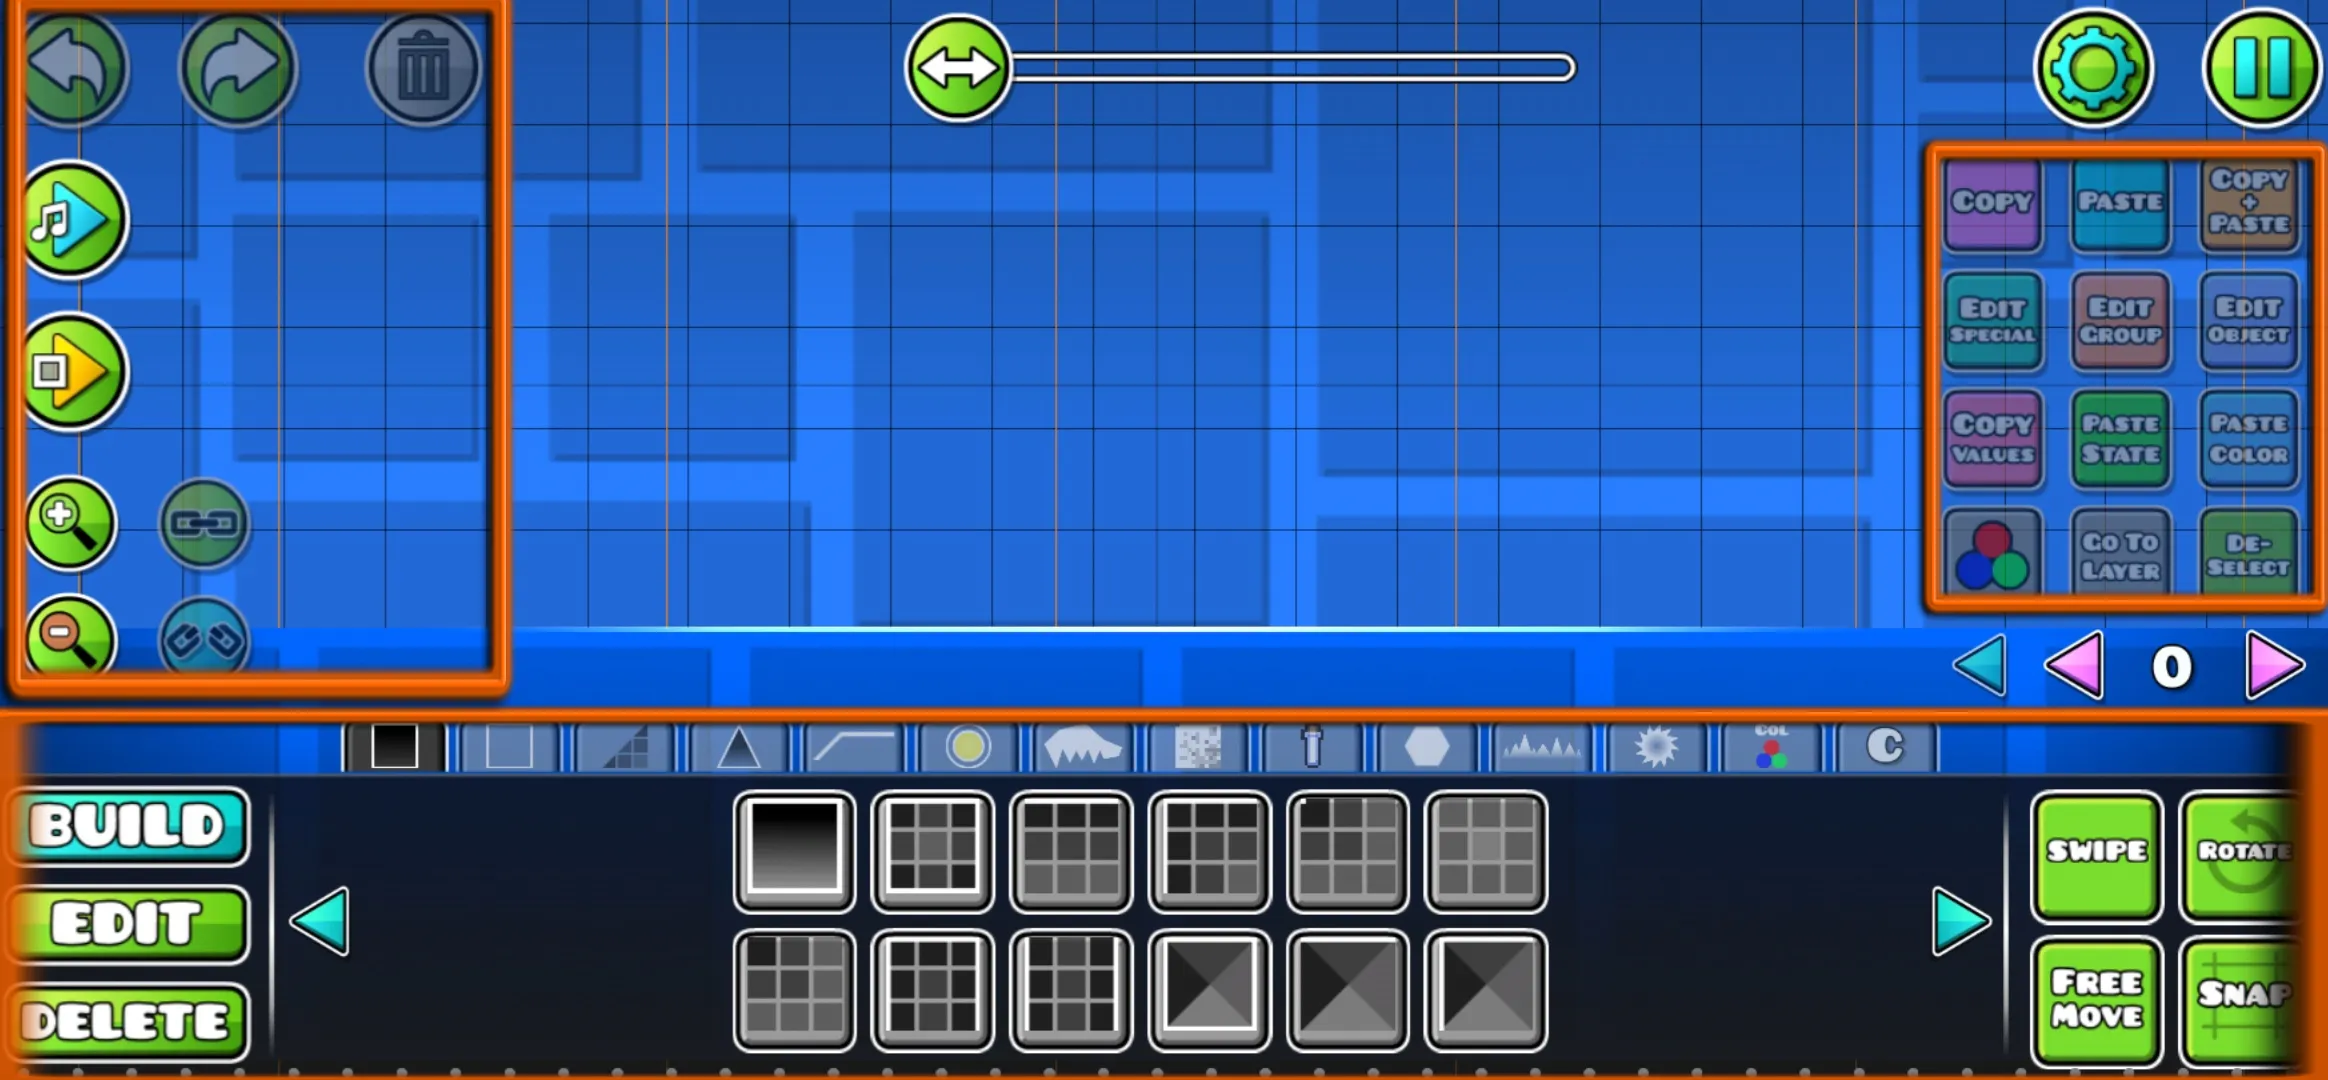
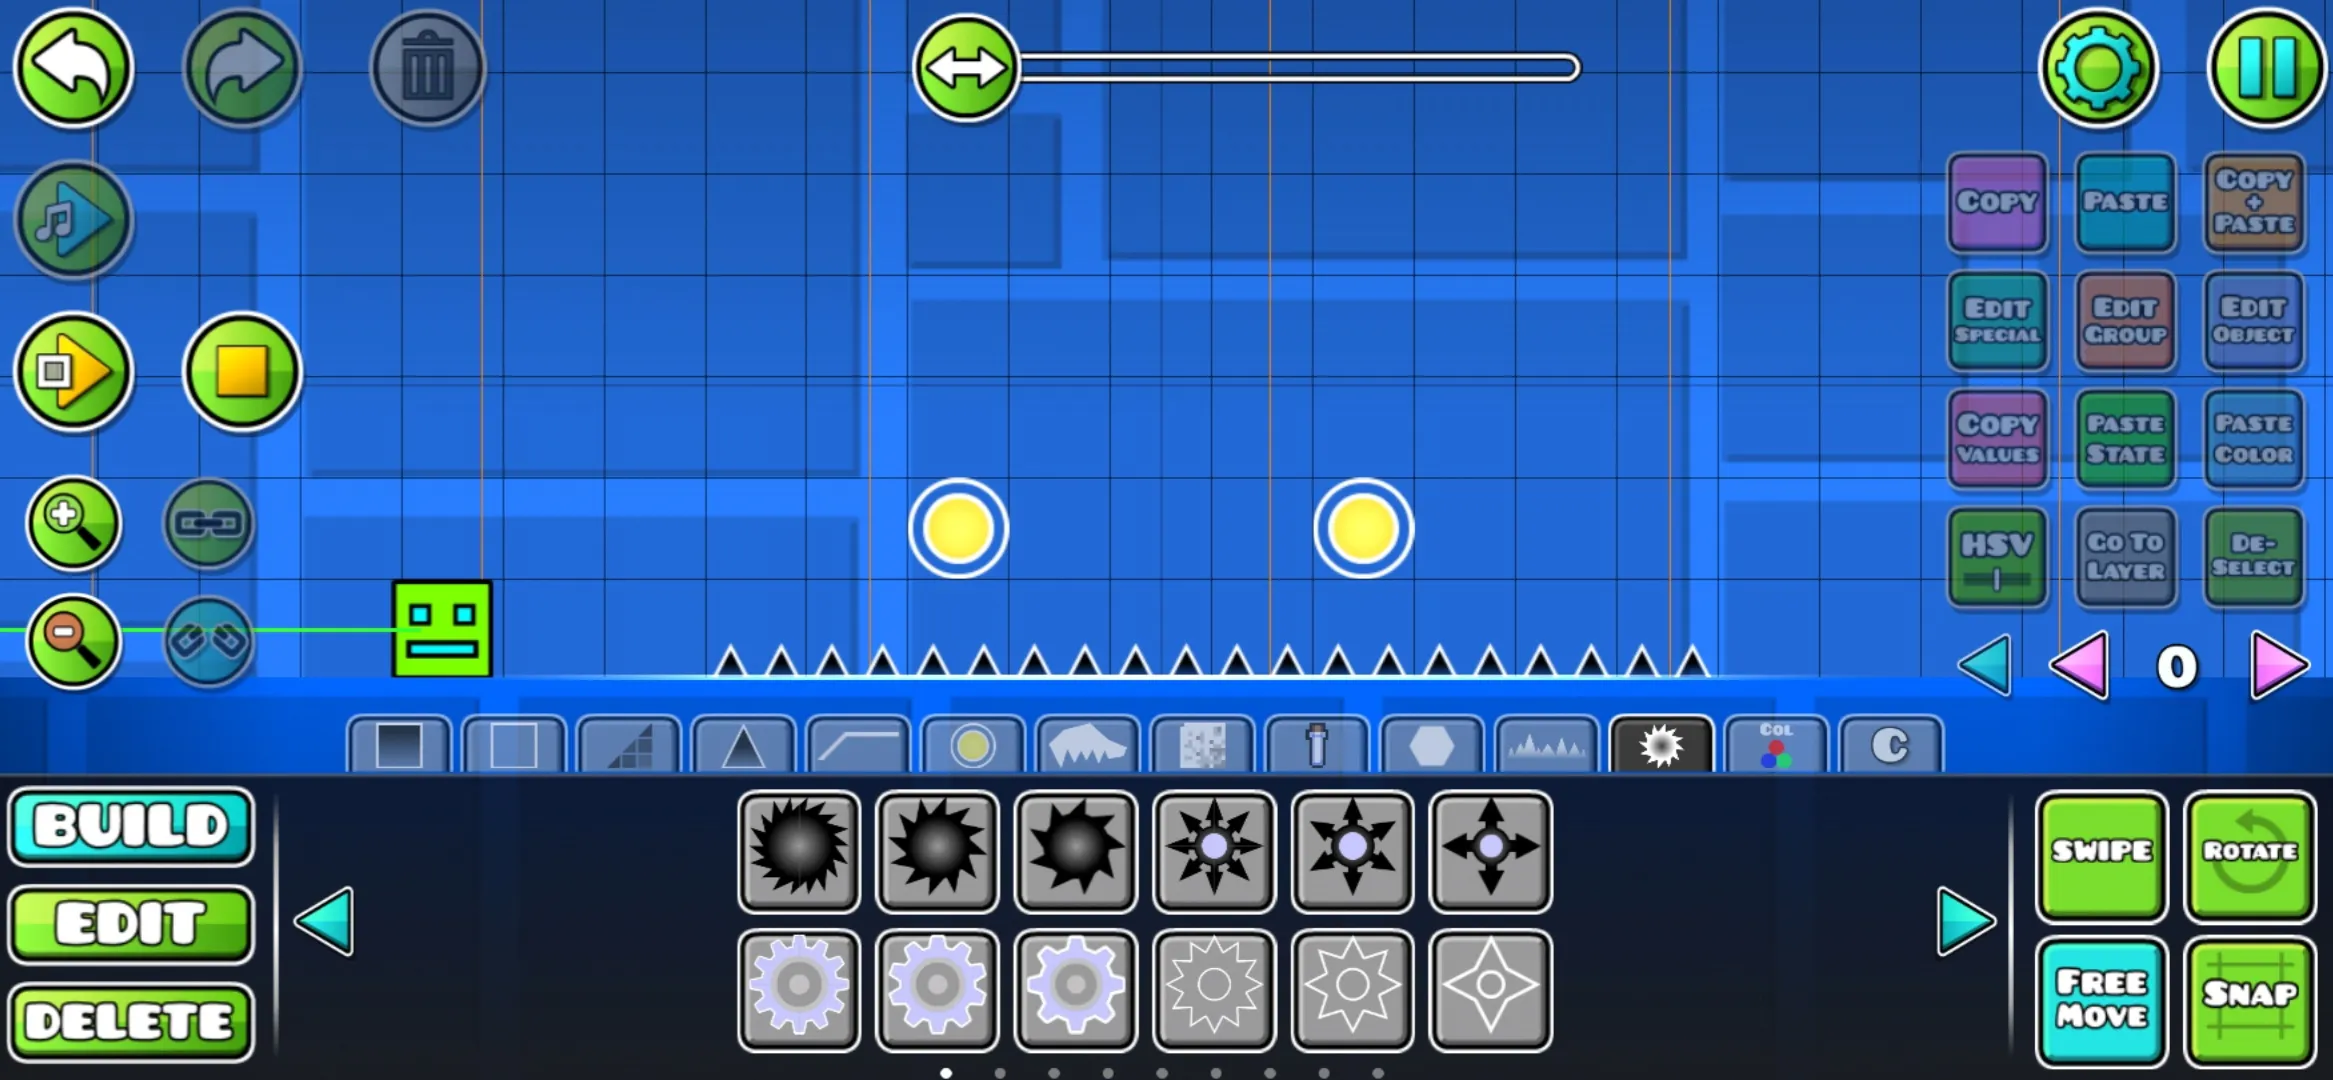
Left Section
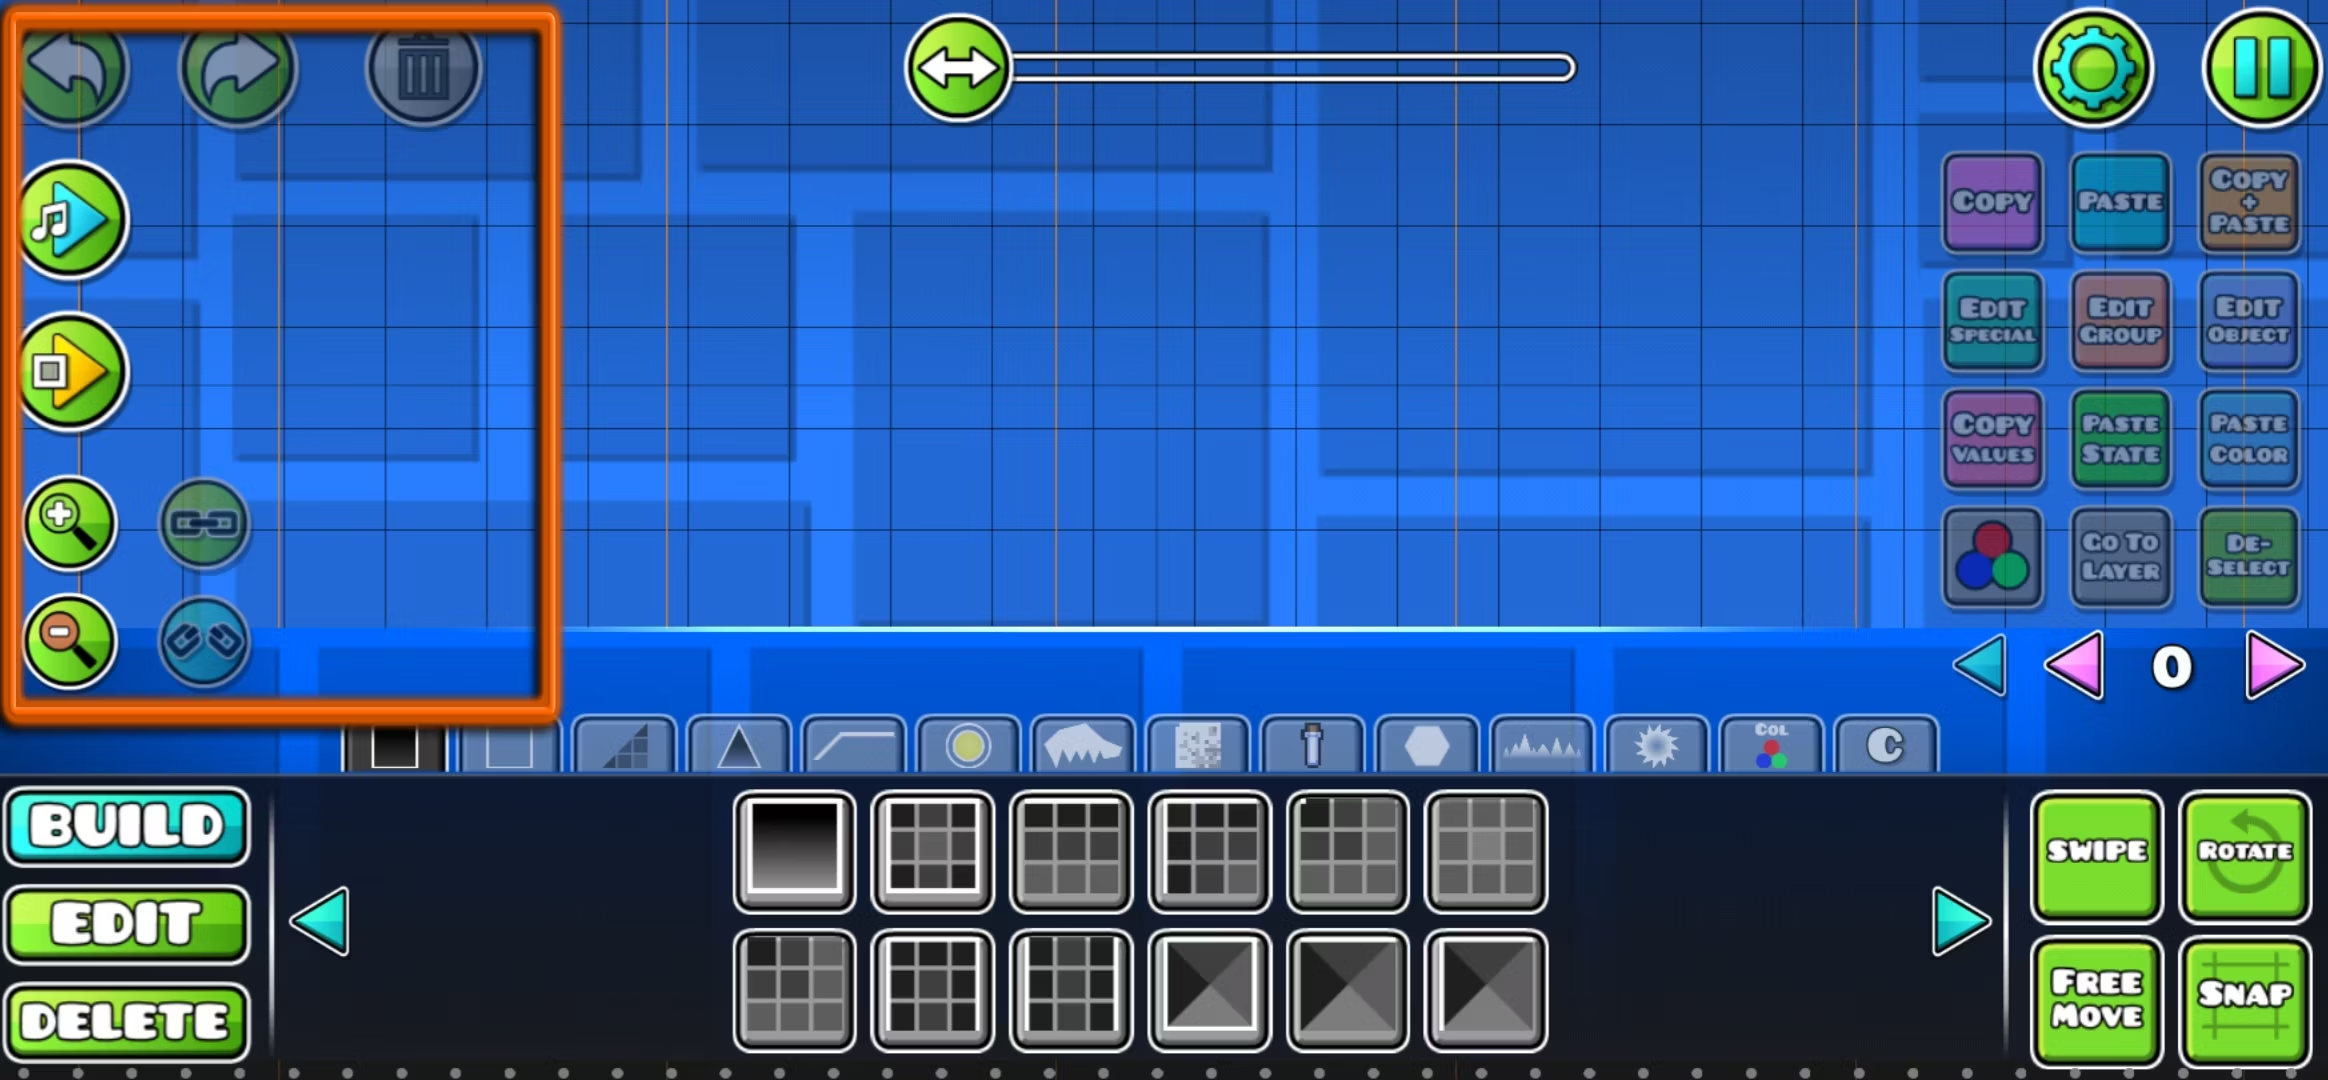
- Undo, Redo, and Delete buttons: These buttons allow you to undo/redo your recent actions and delete selected objects.
- Playtesting buttons: Control the music and test your level starting from the beginning or a specific position.
Right Section

- Copy, Paste, and Copy+Paste buttons: Use these buttons to duplicate or copy objects in the editor.
- Copy Values and Paste State: Copy group IDs and paste them onto other objects for consistent behavior.
- Edit Group: Assign group IDs to objects for controlling them collectively.
- Edit Object and Edit Special: Customize an object’s appearance, speed, and direction.
- De-Select: Deselect the currently selected object.
- Bottom Section: Control gameplay objects and construct your level.
Bottom Section
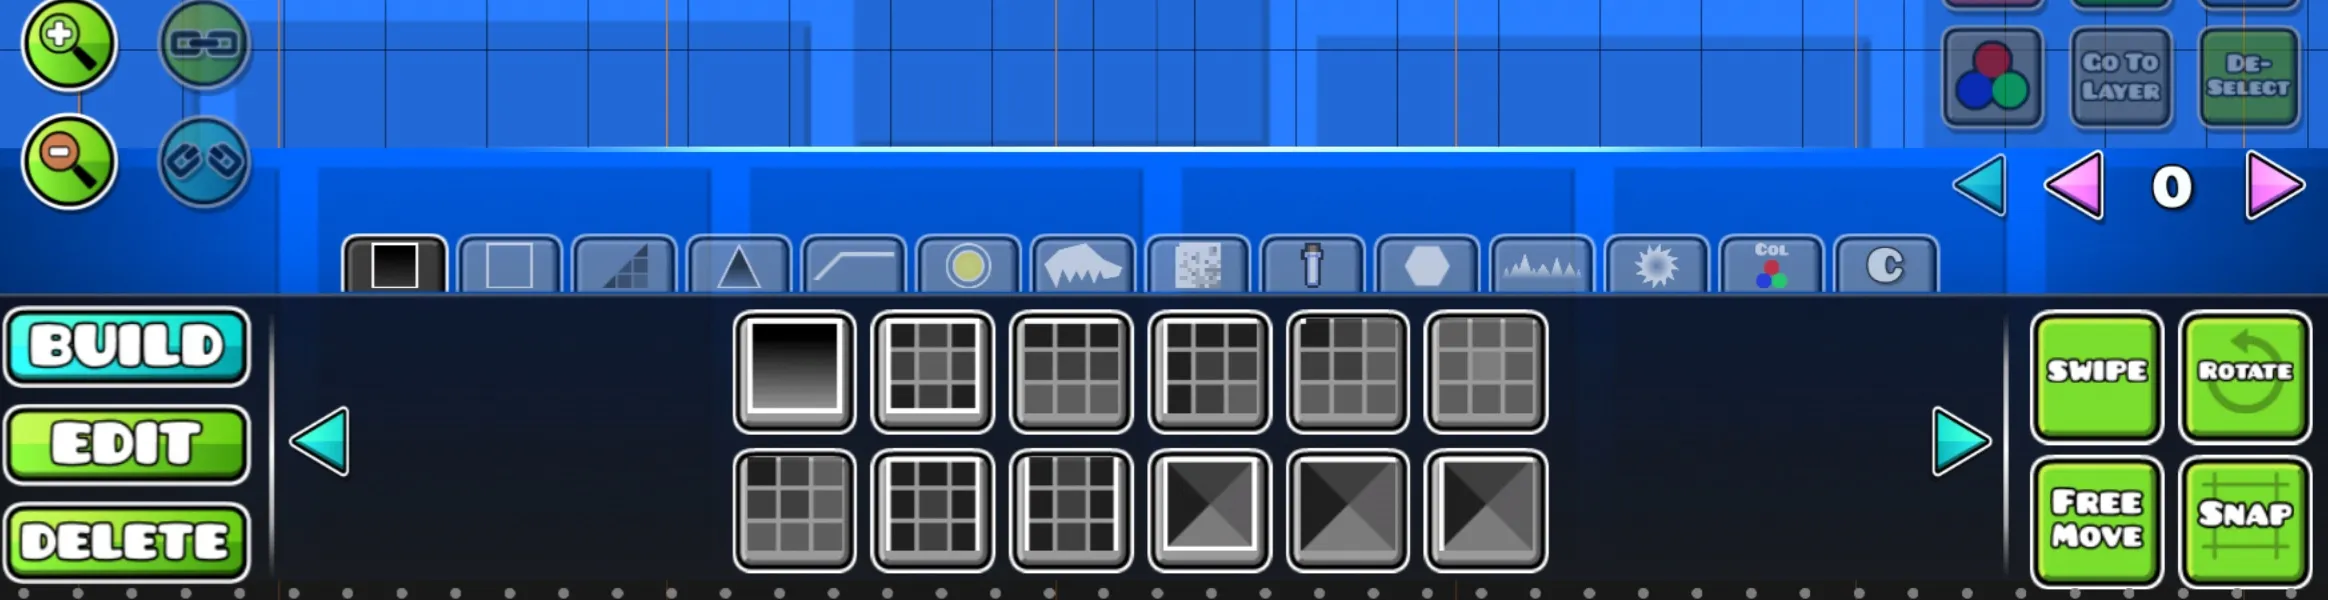
- Objects: the central area where you place all the gameplay objects in your level.
- Build, Edit, and Delete buttons on the left: Use these buttons to build, edit, or delete objects.
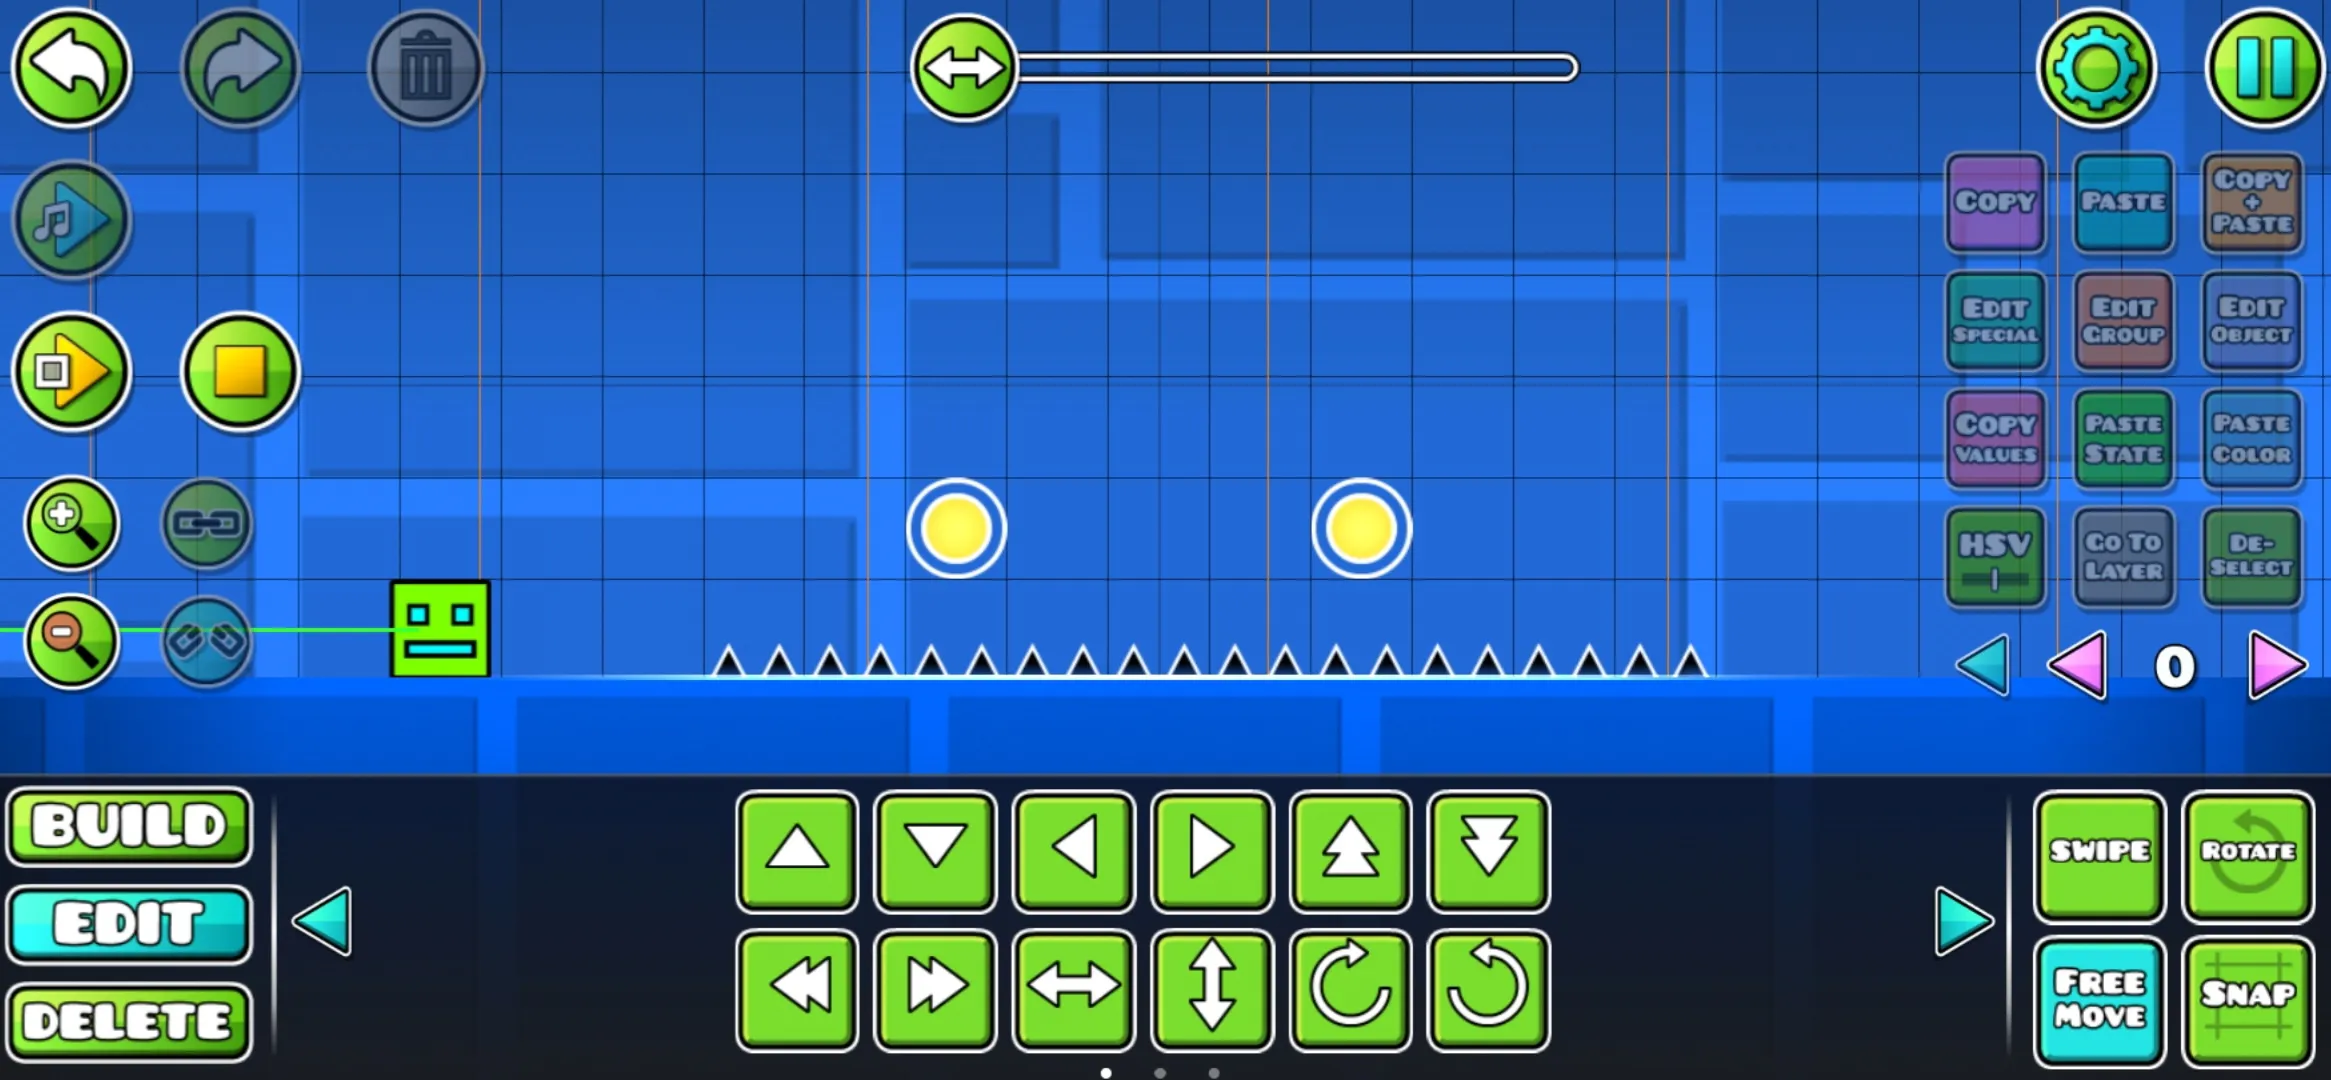
- Swipe, Rotate, Snap, and Free Move buttons on the right: Control the movement and rotation of objects.
- Triggers and Custom Objects: Special objects that offer limitless customization options.
- Triggers: Create movement sequences and complex interactions using IDs.
- Custom Objects: Save and use your own custom objects in the editor.
🏗️ Building Objects
Now that you’re familiar with the buttons and UI, it’s time to construct your level. Geometry Dash provides a wide range of objects to include in your design. Here are some of the essential object categories:
- Blocks: Platforms that can collide with the player or shapes that allow the player to pass through.
- Outlines: Create outlines that can be interacted with, adding a layer of platforming.
- Slopes: Function like blocks but have a sloping shape.
- Spikes: Obstacles that lead to instant loss upon collision.
- 3D: Objects that add a 3D appearance to other platforms.
- Gameplay Objects: Speed changers, portals, orbs, and checkpoints that are useful for creating platformer levels.
- Animated Objects: Objects with built-in animation, some interactable, and others purely for appearance.
- Pixel Art: Objects purely for appearance purposes in pixel art style.
- Items: Collectibles like coins that can be picked up during gameplay.
- Symbols: Icons that can communicate with players in your levels.
- Decorations: Objects for more flexible customization of the level’s appearance.
- Rotating Objects: Circular objects with rotational movement, some dangerous, and others decorative.
Each object can be customized, including its speed and direction. Use the “Edit Special” button to adjust these parameters. You can also add triggers to create complex movements and interactions.
🌟 Start Creating Levels
Now that you have a firm grasp on the level editor UI and the variety of objects at your disposal, it’s time to unleash your creativity and start creating your own levels in Geometry Dash.
To avoid feeling overwhelmed, start small. Build parts inspired by the main levels or incorporate elements from other players’ creations. Don’t forget, you can also copy levels from other players if they’ve enabled copying.
Remember, practice makes perfect. Experiment with different features and gradually incorporate more complex elements into your creations. Take your time, and before you know it, you’ll be crafting levels that will keep players hooked!
Reference List:
- Geometry Dash – Get Diamonds
- Geometry Dash Official Website
- Geometry Dash on Steam
- Geometry Dash Community Forums
- Geometry Dash on Newgrounds
🎮🔧 Now it’s your turn to unleash your creative genius in Geometry Dash! Have fun building your own levels and don’t forget to share them with the community. Who knows, maybe your level will become the next viral sensation? Get creating, and let your imagination run wild! 🚀✨
If you found this guide helpful, share it with your friends who also enjoy Geometry Dash. Spread the knowledge and the joy of creating amazing levels! 🌟